Written by s • Making Compost at Home, Part 2
In our last blog we talked about the basics of compost making. Making this ‘black gold’ from garden and kitchen waste is not only a fantastic way to put goodness into your soil, it is the ideal way to re-cycle that waste, rather than add it to garbage and land-fill. Those leaves, grass clippings, dead flowers and annual plants, and weeds too, can all be composted. Vegetable and fruit scraps, raw or cooked, and even egg shells, can all be put into the compost. This time around we are going to look at practical aspects of compost making, while also remembering the theory behind what we are doing – the basic principles explained last time.
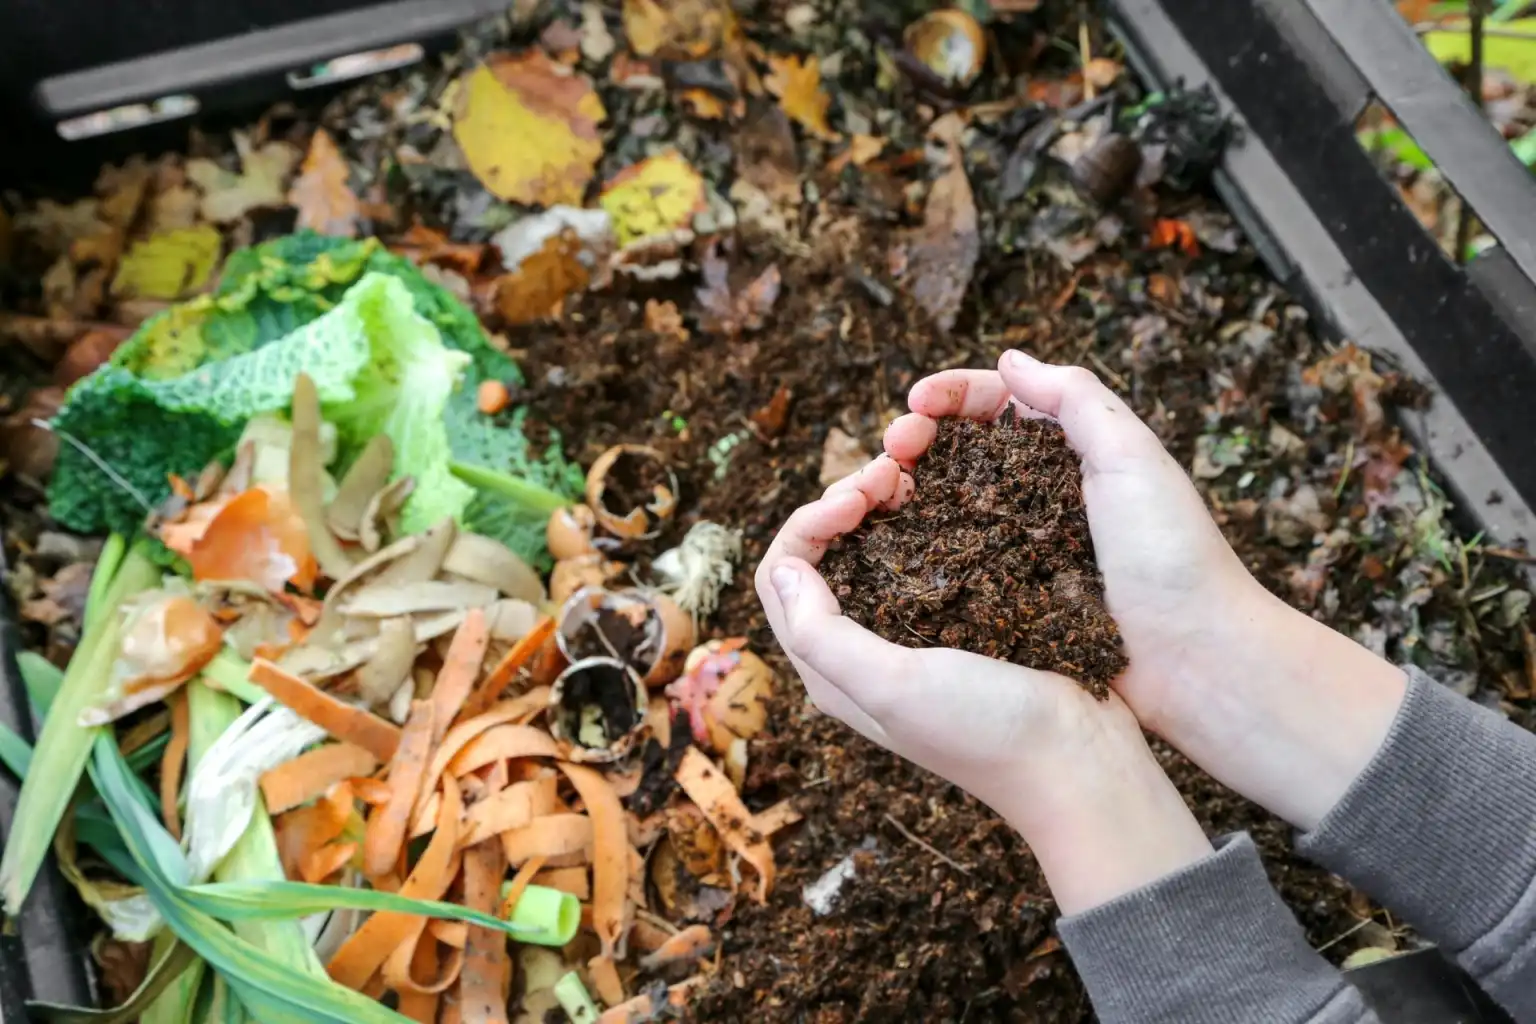
To summarize what we learned, you need four things to make compost:
- Food for the decomposers – the main thing to consider is the carbon to nitrogen ration. The things that go into your heap should be a mix of higher carbon materials, like dead leaves and shredded twigs, with higher nitrogen materials like grass, fresh weeds, or leafy kitchen waste.
- Moisture – you compost needs to be damp – not wet, and not dry. You may need to cover it during rainy weather, and water it during dry spells.
- Air – a dense, compacted heap will soon see the decomposers run out of oxygen, and slow down. In the way you build it, or by turning it from time to time, you need to keep that air supply up.
- Acid regulation – when a heap is working well, it becomes acidic. This slows everything down, so adding something to reduce the acidity is usually necessary.
Now let’s look at how to go about making a heap in your garden, and keeping it active and working well. It’s easy to make compost, and it takes very little time. The results are free organic material for your garden, inside of hauling expensive bags of uncertain content back from the garden center.
Building Your Compost Pile
Choose a hidden spot, if you can – no reason to look at it every day. A shady spot is good, as it will reduce drying and overheating in summer from the direct sun. For a small garden you can buy ready-made black plastic bins that should handle all the compost you have. In a larger garden it is a simple job to build a box of old lumber or chicken-wire attached to corner posts. Two to four feet square is a suitable size, unless you have a very large garden, where it could be up to six feet square. A box is much better than just making a pile, as it takes up a lot less room, and hold the heat better. It is also important to keep the compost warm, and a stack stays warmer than an open pile. The ideal is to have two bins, because then you can have one that you are adding material to, and one that is finished, for spreading on the garden as you need it.
The more chopped and mixed together the material is, the better. Taking a spade and chopping it roughly works well, and running a mower over it works even better. You will be surprised at first how chopping reduces the volume of a big pile, and it breaks down much more quickly, the finer it is.
Two Extra Things You Need
There are only two materials you need – besides the waste – to make perfect compost. One is a source of nitrogen, so that you can rot down the coarser dry leaves and twigs better. This can simply be a bit of left-over lawn food, or other fertilizer, chemical or organic. If you have access to fresh animal or poultry manure, that is excellent too.
The second thing is that acid adjuster we mentioned earlier. The easiest source is a bag of garden lime, which is available at any garden center. If you have a wood-burning stove, or a fireplace, then wood-ash is also perfect for this job, and contains extra minerals as a bonus. Keep it in a dry place.
Some people like to use ‘compost starters’. These are mixtures of fungi and bacteria that rot down the waste. You can try them, but with garden waste there is always a little soil, and this normally contains all the micro-organisms you need. These materials may be useful if you find you are not having much success, but otherwise they are usually not necessary.
Building Your Compost Heap
Begin by putting down about 6 inches of material in the bottom of your container or bin, and sprinkle it with a little of your nitrogen source – that fertilizer you saved. You only need a little. Spray it with some water if the material is dry. Add another layer and sprinkle it with the lime or wood-ash and water lightly if necessary. Repeat in this fashion, alternating the fertilizer and lime, until all the material is used up. Only use enough water to make it moist, not wet. A wet pile will stay cold and decompose very, very slowly. As you have new material, just add it on top of the old, keeping to the pattern of layers. A cover, which could be black plastic, corrugated iron, or a piece of plywood will keep rain out and also trap warmth and moisture inside the heap.
What Happens Now?
In a few days, put your hand into the pile. If it feels warm, then everything is going well. You can buy thermometers for compost heaps, if you really want to know exactly how it is doing (and don’t want to stick your hand in it!). The ideal temperature range is between 70 and 100 degrees Fahrenheit. Much below that and it will take too long, much above and the fungi begin to die. You can cool an overheating heap by stirring it up. Not only does that heat make everything break-down quickly, it kills weed seeds and some harmful pests as well, like insect eggs. In a while you will also see the pile begin to shrink, as the material breaks down. You may see some steam rising on a cool morning – a great sign of a successful heap. You can keep adding new layers until it stops shrinking down. Once that happens you should cover this heap, and leave it for a month or two. Then check to see how it looks. If most of the material is unrecognizable, and you have a coarse, brown pile, it is ready to use. If not, stir it up, add some nitrogen if it is cold, or some lime if it looks slimy, and leave it a bit longer. In summer a heap will break down in about 6 weeks, but in spring or fall it may take 3 months. If you live in a cold place your heap will probably stop working over winter, and need to be kick-started again in spring, by stirring it up.
Some Do’s and Don’ts
Do: Use vegetable trimmings and old vegetables from the kitchen. Cooked vegetables, bread, rice, pasta, etc. can also be added, if they are plain. Anything from your garden can be added, but twigs and thick stems may not break down quickly, so it is best to cut them into small pieces. Mix material like lawn-clippings with dryer material like leaves, otherwise it can go slimy and unpleasant.
Don’t: Add meat, eggs, milk, cheese, gravy or sauces. Although these will break down, they will also generate bad smells, and attract insects and animal pests. Don’t add leaves of plants with serious signs of disease. Although most insects will be killed in a compost pile, many diseases go through it and can then re-infect your plants. Don’t add wood, thick branches, sawdust or bark. These won’t rot and will keep the pile cold.