Written by s • Making Compost at Home
These days, recycling is everywhere. We recycle everything from newspapers to car tires. But our gardens give us one of the most worthwhile opportunities around to recycle and get the benefits for ourselves. I am talking about garden recycling, or, as it is usually known, compost making.
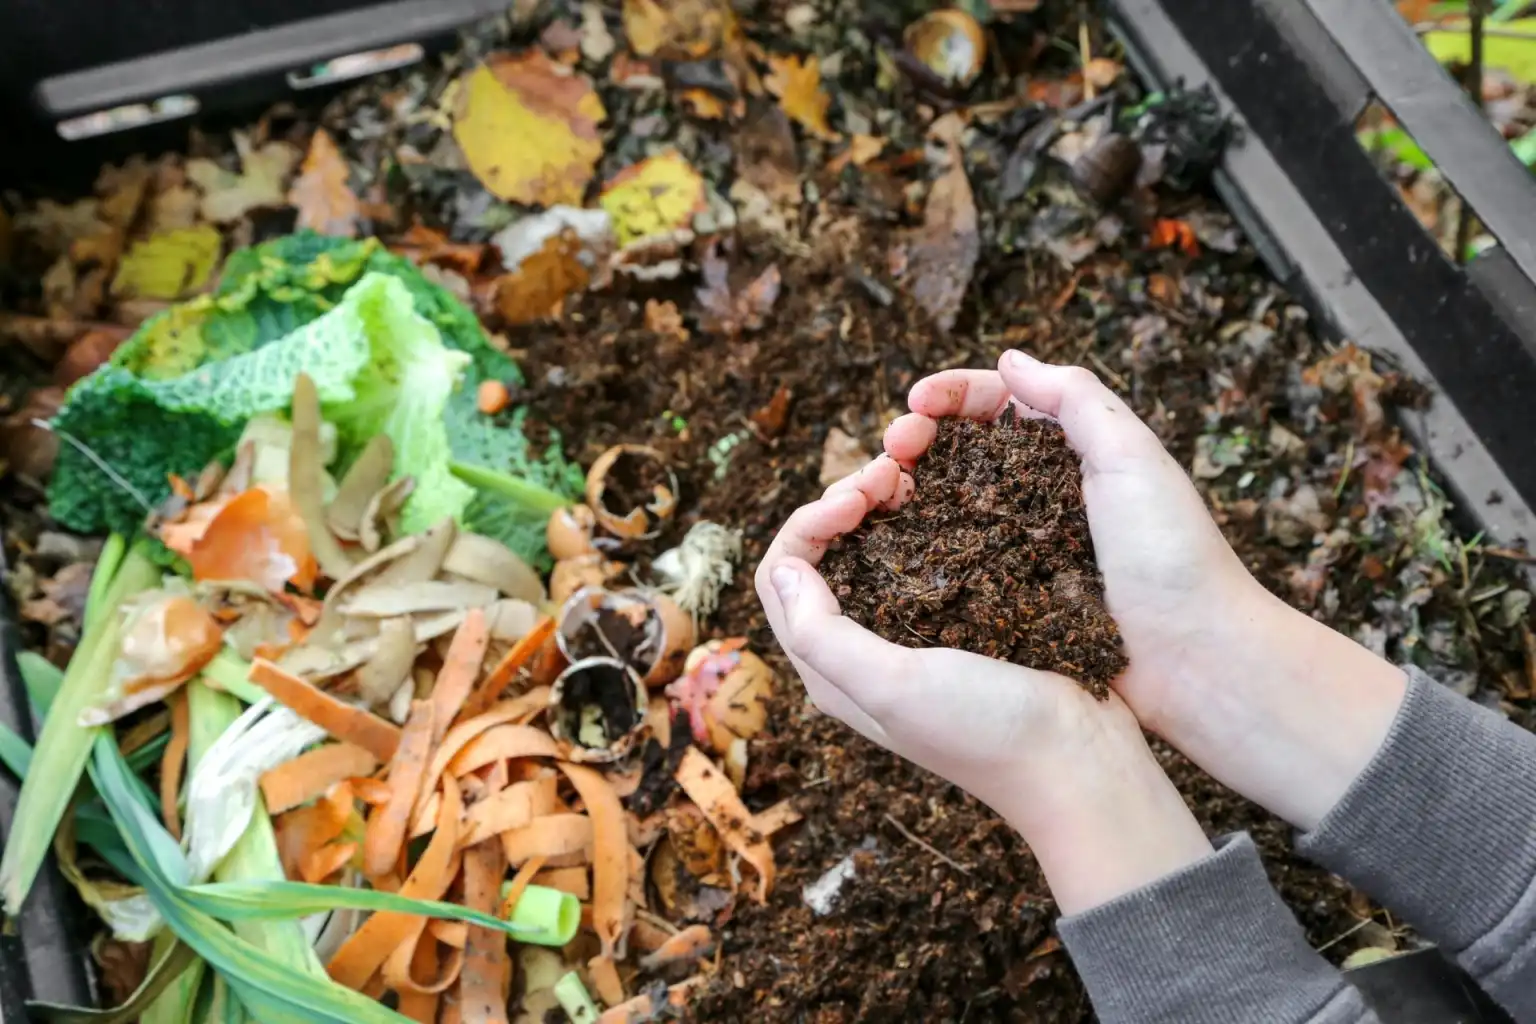
Our gardens generate quite a bit of waste for most of the year, but fall is a season when lots of garden waste is available. Everything from leaves and old annual flowers to vegetable stumps and the stems of perennials are coming at us, and we have just a few options available. We can bag it up and leave it for the trash collection, we can give it to our town for their own compost making, or we can pile it up and, if city ordinances allow, burn it. None of these options is particularly helpful to us, as we do all the work and get little or nothing back. If we opt instead to compost our garden waste, we also create a place to dispose of kitchen waste too, and end up with a terrific product to keep our garden soil healthy, grow organic food, and save on fertilizer too. So let’s look at how to set up simple home composting, and some do’s and don’ts that will give us the best product possible.
The Basics of Composting
Making composting is a straightforward process, but one surrounded by a lot of needless mystique. It is a controlled version of what happens to dead plants (and animals) in nature. Microbes – fungi and harmless bacteria – break down the complex tissues of once-living things, and turn them into their original minerals, and other organic materials called humus. This brown, earthy stuff is the tough parts of the plant, that will eventually be broken down into its basic chemicals, but in a process that will take years. This ‘brown gold’ is what turns poor soil into fertile soil, adding organic material and creating a slow-release fertilizer, which gently puts vital plant nutrients into the soil.
To do their work, these microbes need three things. First, they need a food that contains a reasonable quantity of nitrogen-compounds, to build more microbes. Secondly, they need moisture. Finally they need warmth. So when we build our compost pile, we need material that has a good level of nitrogen in it. Any soft, green plant parts, such as fresh leaves, soft stems, lawn clippings, and vegetable peelings from the kitchen, all provide that. Dry leaves, twigs and branches, bark, sawdust and straw all provide much less, and need to be mixed with a nitrogen-source to compost properly. Many home gardeners use a little lawn fertilizer from an old bag as an easy source of nitrogen. If you have access to animal manure, like horse, cow, sheep or chicken manure, those are also excellent sources.
One more thing. As a compost heap goes about its business, natural acids are generated. This slow down the microbes at their work, so to keep them running at peak-efficiency, we need something to neutralize that acid. A sprinkle of garden lime will do the trick, or some wood ash from a stove or fireplace is ideal.
Building Your Compost Pile
The first thing you need to do is figure out where to keep you compost pile. An out-of-the-way corner of the garden is ideal, and a shady spot is good, as it may dry out or overheat in full sun. If your garden is small, you can buy ready-made black plastic compost bins. For a larger garden you can build a box of old lumber or chicken-wire attached to corner posts to stack your compost in. Two to four feet on each side, and three or four feet wide is a good size. Having somewhere to stack it, rather than just making a rough pile, takes up much less room and the composting works faster too. The ideal is two bins, then you can have one that you are building, and one that you are spreading on the garden.
Once you have collected a good amount of material to make a start, get together a source of nitrogen, and that lime we mentioned. If you keep these in water-proof containers beside your bins they will always be handy and ready to use. If you have material that is very low in nitrogen, like dead leaves or small branches, and material that is high in nitrogen, like grass-clippings and green vegetables, then mix these together roughly. If the pieces are large, chop them up with a spade. If you have a lot, running a lawn-mower through it will make a great fine mixture. You will be amazed at how it reduces the bulk, too.
Begin by putting down a layer about 6 inches thick in the bottom of your bin, and sprinkle it with a little of your nitrogen source. Spray with a little water if the material is dry. Add another layer and sprinkle with the lime and water. Repeat in this fashion until all the material is used up. Only use enough water to make it moist. A very wet pile will stay cold and turn nasty. A cover of black plastic, corrugated iron, or plywood will keep rain out and conserve warmth and moisture inside the heap.
Taking Care of Your Compost Heap
In a few days, if you stick your hand into it, you will feel that the pile is warm. If it is, you are successful. Not only does that heat make everything break-down quickly, it kills weed seeds and some harmful pests as well, like insect eggs. In a while you will also see the pile begin to shrink, as it consolidates, and some gases are released. If your pile didn’t already reach the top, or now that it is shrinking, you can add new layers of material as you have it.
Continue to add new layers until it has stopped shrinking very much. Now cover it and leave for a couple of months. At the end of this time it will be ready to use as a mulch around your plants, or mixed into the soil when you are planting new shrubs and trees. This is the ideal plant food, as it ‘feeds’ the soil too, making it more fertile, less likely to dry-out, and better-draining. If you have very cold winters, your pile may freeze, and stop working. If that happens, once spring comes give it a good stirring with a garden fork, add water, lime and nitrogen if necessary, and it will start up again soon.
Some Do’s and Don’ts
Do: Use vegetable trimmings and old vegetables from the kitchen. Cooked vegetables, bread, rice, pasta, etc. can also be added, if they are plain. Anything from your garden can be added, but twigs and thick stems may not break down quickly, so it is best to cut them into small pieces. Mix material like lawn-clippings with dryer material like leaves, otherwise it can go slimy and unpleasant.
Don’t: Add meat, eggs, milk, cheese, gravy or sauces. Although these will break down, they will also generate bad smells, and attract insects and animal pests, like rats, raccoons and foxes. Don’t add leaves of plants with serious signs of disease. Although most insects will be killed in a compost pile, many diseases go through it and can then re-infect your plants. Don’t add wood, thick branches, sawdust or bark. These won’t rot and will keep the pile cold.