Planting Guides How To Plant a Privacy Screen
Privacy is a major consideration for many gardens, but you are about to solve that problem in your own yard. The plants you chose for your screen have arrived and now it’s time to plant them. A few simple steps are all it takes to do it right and this guide will help you achieve the best outcome and give you the perfect screen.
A privacy screen is not the same thing as a hedge, which relies on regular trimming to keep it dense. A privacy screen should be planted so that it can grow naturally into a solid barrier, so the spacing will be greater and it will take a little while for your screen to fill-in, depending on what kinds of trees you are planting.
In a Nutshell
– Remove all packaging
– Water the trees in their containers
– Mark the planting spots for each tree
– Prepare the soil
– Dig your planting holes
– Place each tree in its hole and replace most of the soil
– Water well, let the water drain and put back the rest of the soil
– Put a mulch over the roots and water once a week for the first season
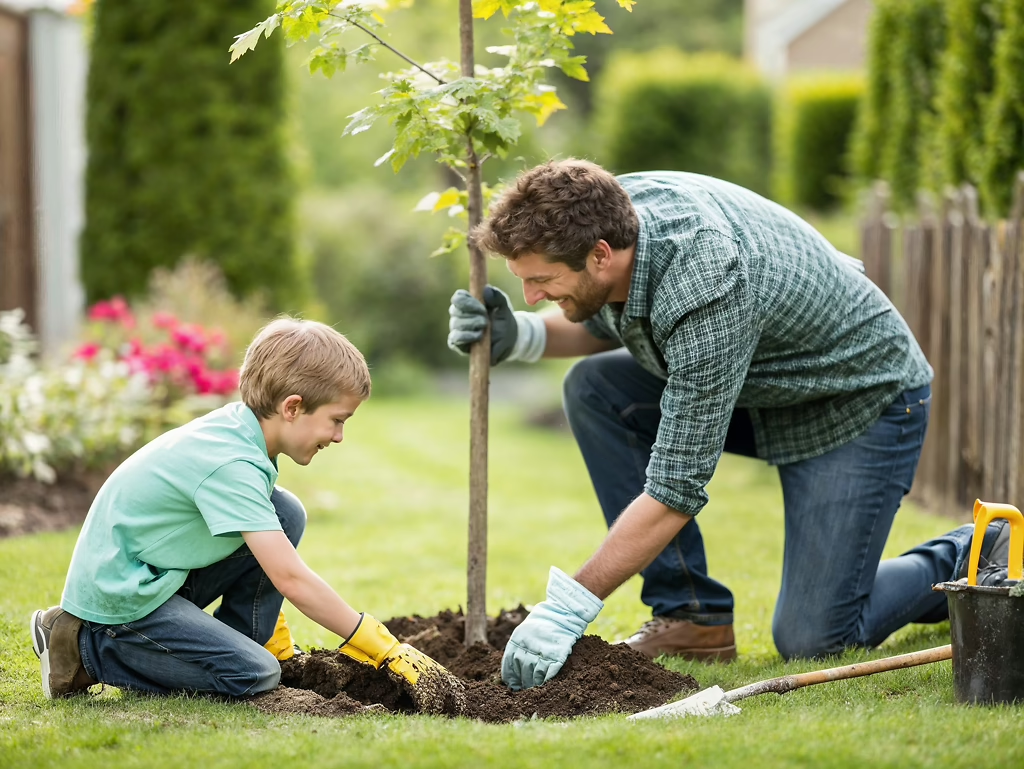
Getting Your Trees Ready to Plant
 The very first thing to do is un-wrap your trees. Remove all the wrapping materials, remove the trees from the box and remove any wrapping around the trees themselves.
Do not remove them from their pots and do not remove any wrapping around the roots if they are not in pots. Move your plants around by picking up the pot – do not lift them by the trunk or stem.
It may be that your trees are wrapped in cloth – burlap – in a method called Ball & Burlap or B&B. We will give you some tips on planting from this specific method. The first tip is to always move the plants by the ropes that wrap them up, not by picking up the plant, which can cause the ball to begin to split.
If it is late fall, winter or early spring, your plants may be Bare-Root, with just some plastic wrapping around the roots. This is a normal way of handling deciduous plants when they are not growing and have no leaves. We will give you some tips on planting this kind of tree too.
Care Before Planting Time
Your trees have been on a journey and they will be a little stressed, so place them in a shady part of your garden and give them a good watering. Do not put them in the garage, a shed or in the house, even if it is cold outside. Do not remove them from the pot, or unwrap the roots.
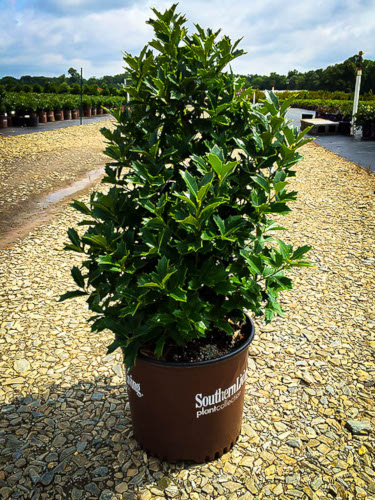
If your trees are in pots:
If you are not going to be planting for a little while, that is fine, they will be happy in their pots, but if they are sun-loving, after a day or two in the shade, move them to a sunny location. Remember to water every day or every second day, depending on how warm the weather is – do not let the pots become completely dry. If a pot does become very dry, place it in a bucket and half-fill the bucket with water so that the soil can soak completely.
If your trees are ball & burlap:
Treat them in the same way as trees growing in pots, but if the weather is very warm, piling some mulch over the root-balls will help keep them from drying out quickly. If they become very dry, soak them gently; do not place them in bucket of water as this may cause the root-ball to disintegrate.
If your trees are bare-root:
There are two options after you remove the wrapping from around the roots:
– If you are planting within 24 hours or so, just plunge the roots into a bucket or other container of water and place them in the shade.
– To leave them for a longer time, dig a shallow trench, lay the trees at an angle with the roots in the trench, water well and put back the soil. Trees can be left like this for a long-time, at least until the buds begin to swell, when you need to get them into their final home.
Laying Out Your Screen
Privacy screens are usually put along a property line and if you are planting along the property line, remember to plant well inside that line or you could have future problems with your neighbors. If you plant right on your property line your neighbor has a legal right to cut plants back to the boundary, so plant well inside your own property to make sure your screen remains intact and thick. Planting at least five feet, and preferable more, inside that line will give you complete control over the growth and any trimming of your screen – an important consideration.
Planning Your Screen
Since a screen does not involve much if any trimming, the spacing of your plants should be wider than for a hedge. If you plant too closely and do not trim your trees regularly, they will grow tall but the lower branches will weaken and die after a few years, leaving you with open spaces again and you will lose much of your privacy.
Look at the Mature Width of the tree listed on the plant description page of our website. If there is a spread given (20-30 feet, for example) take the lower figure. Divide this number by three. This is the correct spacing for your trees. So if you have chosen trees with a mature width of thirty feet, then a spacing of ten feet will give you a nice dense screen with each tree having enough room to develop strongly.
The first and last plants each go half the chosen spacing distance from the ends of the area you are planting.
If you need a dense screen more quickly, plant your trees in two rows, with the plants staggered. Space the rows one-quarter of the Mature Width apart and plant the trees in the rows at half the Mature Width. This still leaves the trees ten feet apart, but now they are in a zig-zag and visually closer together than in a single row. For example, if the Mature Width is 30 feet, the rows would be seven and a half feet apart and the trees would be fifteen feet apart in the rows. They will appear to be seven or eight feet apart when viewed straight on.
It is best to place the trees in their pots where you plan to plant them, so you can be sure it looks right. Then replace each tree with some kind of marker so you can prepare the planting spot.
Preparing the Planting Spot
Good soil preparation is the key to the success of your trees. Whatever your soil is like, use it. Do not try to dig a hole and fill it with soil you bought somewhere else. If your soil is poor, just use extra organic material.
You goal is to make an area of looser soil that the young roots can penetrate easily, getting food as they go and establishing quickly. An area two to three times the width of the pot is the minimum area you should prepare for each tree.
Add some organic material to the soil as you dig. Almost any kind of organic material is good, among the best are well-rotted animal manures; garden compost; any ‘top-soil’ from a garden centre; or if you have nothing else, peat-moss. Use enough organic material to cover the area two to four inches deep. In addition, trees need fertilizer to help develop their roots. This can be rock phosphate or bone-meal or any kind of superphosphate. There are many ‘tree planting’ fertilizers available too and they all work well, so whatever is available will be fine.
Remove roots of weeds from the area and any stones bigger than your fist. Smaller stones can be left and it is not a good idea to sieve the soil to remove smaller stones – they are best left in and can help with drainage.
Turn over the soil, mixing the organic material and fertilizer into it and then level it off and get ready to plant. Save some of the organic material you used to mulch your trees after planting.
Preparing the Trees
The evening before you are going to plant, give trees in pots or ball & burlap a good soaking with water. If the root ball is dry when you plant, it may stay that way and cause your trees to suffer from dryness even if the surrounding soil is damp.
If your trees are bare-root and have been in a trench, transfer them to a container of water for a few hours before planting.
Digging the Holes
Since you have already prepared the soil, all you need to do is dig holes the depth of the pot and a little wider, so that you can fit the tree into the ground.
Removing the Containers
For trees in Pots: Slide the pots gently off the plants. You may need to tap the edge a couple of times to release the root-ball, but it should slide out pretty easily. Usually there will be plenty of roots filling the pot and the root-ball will stay together and not fall apart at all.
If it looks like the soil is going to fall off the roots, don’t worry, that is easily dealt with. If you tree is dormant, with no leaves, then just let any extra soil fall into the planting hole. If your tree is growing, with green leaves, then leave it in the pot, take a sharp knife and cut around the bottom of the pot and remove the base. Then get someone to hold the pot together while you cut down the side of the pot. Tie a piece of string around it to hold it together while you plant.
For Ball & Burlap trees: Keep all the coverings on the roots until you have them placed in the hole. Then use a sharp knife to cut through the ropes and remove them. Any pieces left underneath the trees will not cause a problem. Unfold the burlap to expose the roots and trim away any surplus. Do not try to lift the trees to remove the rest – just push it down into the soil where it will soon rot.
For Bare-root trees: These can be laid against the side of the trench to get the positions right. If the weather is hot and dry just plant a few at a time – it is important that the roots do not become dry. Have a helper hold the tree at the correct depth – there is usually a mark on the stem where the soil came to – and spread out the roots, adding soil and pressing it around the roots until they are completely covered.
Planting Your Privacy Trees
 Now check that the top of the root-ball is level with the soil around it. Replace about three-quarters of the soil in the hole, pressing it down around the roots of the tree. If you have left the pots on, as described above, do the same thing, but when you have finished, cut the string holding the pot together and gently work the cut pot out of the soil. Finish firming down the soil – a gentle foot pressure or firm hand pressure is about right.
Watering Your Trees
Now fill the hole with lots of water, letting it soak down into the ground and into the root ball. Use plenty of water and then wait until it has all drained away. This will give lots of water around the roots, where it is needed.
Finishing the Planting
To finish off, put back the rest of the soil, firming it gently down. Make sure you have only covered the top of the root ball with a very little soil, no more than one inch. If you can still see the top of the root ball, that is also fine. You can use any left-over soil to make a low ‘wall’ around the plant, so that water will naturally run into it – this will be a great help with watering. Put a layer of organic material over the root area, about two inches deep and then water the whole area thoroughly again.
Planting in Clay and Wet Soils
If you have heavy, clay soil that stays wet for long periods, there is a special trick to planting which will help your hedge establish itself better. When you place the plants in their holes, put enough soil under them to raise them one or two inches above the surrounding level. When you put back the soil, make a mound, with the tree now sitting above the general level of your garden. This will help water to drain away around the roots until your tree adapts to the location. You should still use mulch over the roots.
Staking
Normally staking is not necessary. Modern arborists prefer to let the wind strengthen the tree, and stakes often cause breakage of the upper part of your tree.
Even with bare-root trees staking may not be necessary. Take hold of the trunk and bend the tree back and forth a little. If it does not move in the ground you do not need to stake. If it does move it will need support.
If you do need or want to stake, use two short stakes, well driven in but showing just a foot or so above the soil. Place these on opposite sides of the tree, outside the area where the roots are. If the prevailing wind is, for example, from the north, then place one stake on the north side and one on the south side. Wrap some cloth around the trunk to protect it and tie a strong rope from each stake to the trunk. Some remaining movement in the upper part of the tree is fine, it does not have to be held rigidly, and in fact that is not a good idea. A stake high up into the tree is normally not necessary and can do more long-term harm than good.
Remove all stakes after one year of growth – leaving them longer is not necessary and may be harmful to your tree.
Follow-up Care of your Privacy Screen
Until your trees are established and have spread out their roots, they will need regular watering for the first growing season. How often depends on the weather, but a good, slow soaking once a week is usually best, or twice a week if the weather is hot. Soak the whole area around the tree, not just up against the trunk. Future watering will depend on the type of trees you have used, your soil-type and local weather conditions.
It is a good idea to do some light trimming as the trees grow, to keep them dense and give a better screen.
If you follow these simple steps your privacy screen will be healthy, dense and strong, giving you great screening for many, many years to come.[/vc_column_text][/vc_column][/vc_row]