Written by s • Get the Most Out of Hosta – and have outstanding shade gardens
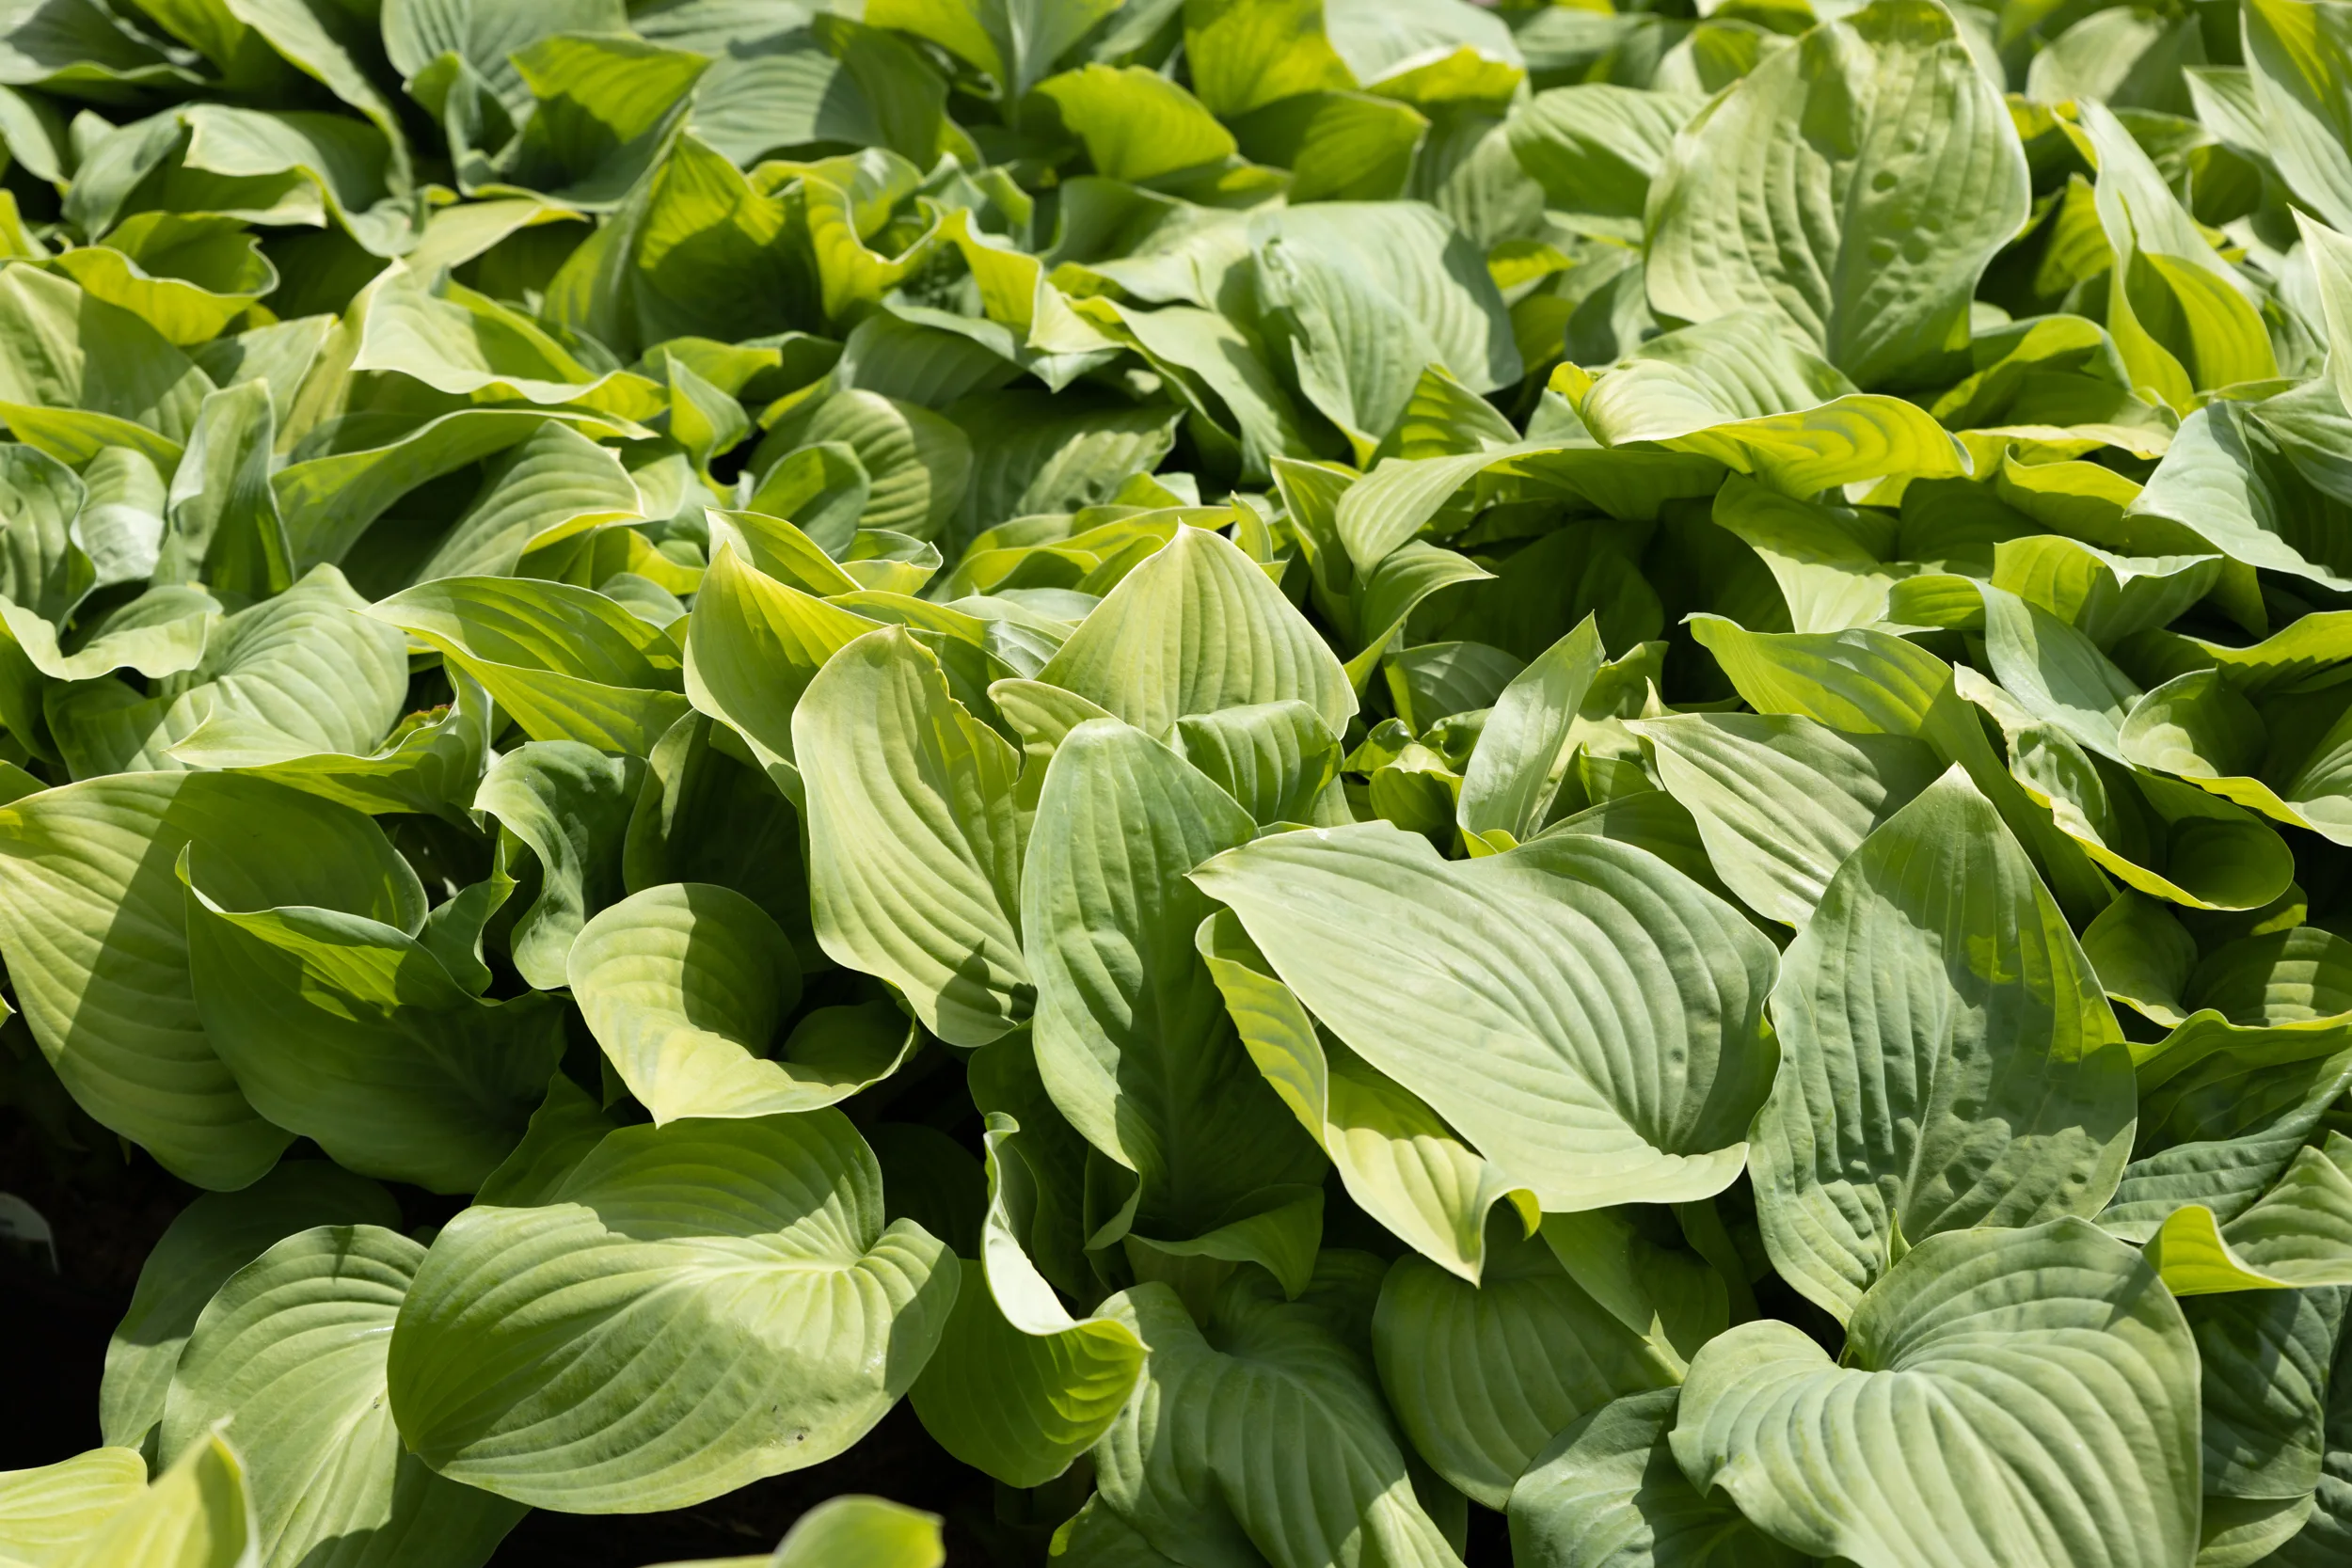
Every gardener will recognize a Hosta plant, be it blue, green, yellow or green and white. It is certainly the most popular of all shade plants, and given that almost every garden has shade, it has to be the most popular garden plant, period. If you are like me and other professionals in gardening and plants, you see a lot of gardens, big and small. So we see a LOT of Hosta, and frankly we see a lot of unhappy, even sad Hosta. Yes, in some gardens they are big, lush and packed with beautiful leaves. But in others they are thin, burned, hardly growing and in the end, unattractive.
Everyone says how easy these plants are to grow, and it’s true, they are. But they don’t grow themselves, and there are things you can do to make their life easier, and your garden more attractive. So let’s explore the ins and out of success with Hosta, so you can get the most out of these great plants – and have an outstanding shade garden of your own.
Choose the Right Spot
Tough they may be, but even Hosta can’t do the impossible. Yes, they enjoy and even thrive in shade, but that doesn’t mean if you plant them everywhere they will succeed. Planted in the dry, thin soil beneath that big spruce tree, with branches a couple of feet above the ground, changes are they won’t look great on Instagram.
The ideal light for Hosta is bright, even with a couple of hours of morning sun, but protected from direct sunlight for the rest of the day. In warmer zones, full shade is usually better. Deciduous trees, especially with taller trunks, hardy ever pose a challenge, but dense, thick evergreens can be a bridge too far. The foot of north-facing walls and solid fences is always a great place, especially if you can see the sky overhead. So is the shadow-zone to the north or east of tall trees, but check it out around the end of June to be sure it doesn’t get sun-blasted in the early afternoon.
Choose the Right Plants
Not all Hosta are created equal, and choosing the right variety for the job you are giving them is the first step to success. Fortunately, if you are buying your plants from us, you will find in our detailed descriptions everything you need to know about using a particular plant for particular purposes.
Do you want to cover larger spaces with easy ground cover?
For this, choose varieties that are fast-growing and spread easily, forming larger clumps within a few seasons. While plants with striking leaf patterns or very large leaves, those plants, with some exceptions, can be slower to expand. Choose instead plants with medium-sized leaves and not too much white or yellow on their leaves – with less chlorophyll these varieties tend to grow more slowly than plants that
Do you want striking specimen plants?
Big-leaf Hosta have a lot of appeal, and are essential in any collection. Be prepared, though, to wait a few seasons for them to really get big, and remember too that they need rich soil and plenty of water in spring to reach those record sizes – worth it though, when you see them thriving for you.
Match the plant to the space
It may seem obvious, but if you have larger spaces to fill, it makes easy sense to choose bigger leaves or faster-spreading plants. So check the size before you buy, and keep the little guys for special pockets in high profile areas – they can’t fill big spaces, no matter how hard they try.
Match the plants to climate
It can be hard to grow Hosta in the southeast, partly because of the heat and humidity, and partly because of the warm winters. Most Hosta need periods of cold and in zones 8 and especially in zone 9, few will grow. Check out this blog on choosing Hosta for hot zones. In zones 7 and 8, summer heat can be a problem, but we have noted in our descriptions which varieties do best in those areas – check carefully and succeed.
Prepare the Area Well
If there is a single ‘secret of success’ with Hosta, this is it. Put some effort into making a good planting area, and your Hosta will thank you by thriving. It is common to plant them beneath established trees, and these can be among the hardest spaces to prepare properly. The soil is often depleted of nutrients by the trees, and they steal all the water too. If you just dig small holes and push Hosta into them, you won’t have much success. The secret is to create an area more or less free of tree roots for the first couple of seasons. There is no way to keep tree roots out permanently – even root barriers have a limited life, but if you can give your shade plants like Hosta a head-start, so they are well-rooted and established before the roots grow back too much, you will succeed. Follow these steps and you will win.
- Use a garden fork to loosen the soil between the existing roots. With pruners or a sharp spade, cut out smaller roots – those no more than an inch across – as you find them. Leave larger roots alone, removing some smaller roots isn’t going to hurt the trees at all. Try to create a zone at least 8 inches deep – preferably a bit deeper – of root-free soil across the whole bed area.
- Cover the area with a layer of rich compost or rotted manure, or rotted leaves if that is all you have. Don’t use peat moss – it has no nutrients and tends to repel water once it is dry. You need a layer at least 2 inches deep, and preferably 4 inches deep.
- Now turn that compost into the soil, creating an even mixture.
- Yes, this all takes time and some effort, and try not to use a tiller, as this can cause too much damage to the surface of larger roots, letting diseases into your trees. Don’t leave jagged, broken roots – cut them cleanly off as you go.
The night before planting, water the area thoroughly, and the plants in their pots. Use plenty of water while planting too.
Make an Effort in the First Season
The first season is the crucial one for success, and to a lesser extent the second one. Water as often as you can – it is almost impossible to drown Hosta unless you are planting a swamp. At least twice a week, and perhaps every other day in hot weather. Use liquid fertilizers too, ones for leafy evergreens with a high first number is perfect. Keep this up in the second season too. By then plants will be established (and the tree roots will have grown back!) so they can hold their own much better.
Keep Them Vigorous
Even if you put it the needed work to get everything off to a great start, your beautiful display of big, lush Hosta can go into decline over the years. Prevent this by mulching regularly. Every second fall or spring, put down a layer of rich compost at least 2 inches deep right across the whole bed. Do this after you cut down the leaves, and don’t worry, covering the buds is actually a good think, because they root around the base of the bud, spreading feeding roots into the compost before the trees get in their. Regular mulching will keep your Hosta planting great for years and years.
If you do start to see some plants getting less vigorous, and perhaps developing holes in the center of the clump, it’s time to divide them. This is best done in early fall, while the plants still have leaves, because then you can see exactly how big they are to space them out properly. Lift the clump, and use a sharp spade to chop it into smaller pieces, discarding the older material in the center and cutting the outer zone up like a pie. Dig over the whole area, adding plenty of compost, and replant, leaving just the tips of the buds showing. You will be amazed at the vigorous new growth you get – and the chance to plant up whole new areas with ‘free’ plants!