Written by s • 5 Steps to Better Soil for Fall Planting
Now that fall is beginning, this is prime planting season for trees and shrubs. Planted now, rather than in spring, they will establish roots over winter – even in the coldest areas – so when the first warm days arrive they will be ready to go. This maximizes the growing season, and gives you mature plants that much sooner – the garden you are dreaming of when you pick up that spade and decide to plant a tree.
5 Easy Steps to Get the Best Planting Soil For Fall
1. Dig deep to bring back the goodness to your soil – if you have a new garden, you need to open up the lower levels
2. Dig wide too – tree roots spread outwards, not down
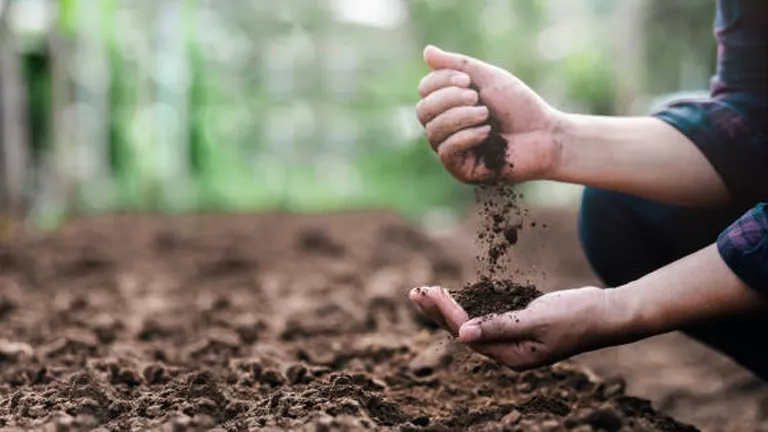
3. Add organic material, whatever your soil – sand or clay, organic material is the miracle ingredient
4. Add the basic nutrients they need – depending on where you are, basic nutrients can be in short supply
5. Follow up with rich mulch – rich organic material keeps your soil healthy, so your plants are healthy too
Step 1: Dig Deep
If you are starting a garden in a development, the soil has often been neglected for decades. It could be virgin land, or old farm land that has not seen a plough in a long time. You might imagine that the best part of the soil is on the top, but in undeveloped or neglected soil that isn’t true at all. Water movement through the soil, as rain drains away, carries nutrients and the richer clay particles deep into the ground, leaving the top layer more sandy and lower in nutrients. Plus, the spaces between the particles of the soil naturally become smaller over time, so plant roots find it harder and harder to penetrate, searching for those deep nutrients. We can help them, and open up those deep reserves, by digging deeper.
Whatever method you use – spade or rototiller – the goal is to dig as deeply as possible. Don’t go over the ground just once with that rototiller. Make several passes at it instead, trying each time to work the machine deeper into the ground. If you are hand-digging, dig to the full penetration of the spade. Again, if you are not used to digging, you might need to go over the area twice. The extra effort will pay big dividends in rapid, vigorous growth from your new plants, as their roots are able to explore deeply into the ground, finding water and nutrients as they go.
Step 2: Dig Wide Too
If you are preparing planting beds, they will naturally be wide. But if you are doing individual holes in a lawn, perhaps to plant a shade tree, width is even more important than depth. It’s a common misunderstanding that the roots of trees grow just to the ends of the branches. In reality they extend much further out. The root-system is broad, and often just a foot or two deep depending on the type of soil, and the type of tree. When planting a tree it is best to do it into a hole that is 3 times as wide as it is deep – and it should only be deep enough to hold the root-ball. Loose, freshly dug soil underneath a tree allows the tree to sink over time, so that its roots become deeper than they should be. A wide, relatively shallow hole encourages root spread.
When the roots grow outwards, instead of being trapped in a narrow hole, there is also less chance of roots girdling the tree in the future. As the trunk grows thicker, so do the roots close to it, and if they curve around the stem instead of heading out, they can strangle the tree a decade or two down the road.
Step 3: Add Organic Material to Every Soil
If there is a miracle product that improves every soil, it is organic material. For best results this should be something like garden compost or well-rotted animal manures. Mushroom compost is excellent too – you might have a local mushroom farm nearby who can supply it. Dairy farms and stables often have large amounts of manure you can bag up and take away. See if your city has a waste composting program, because they often sell the compost cheaply, or even give it away. Just make sure it is well-rotted, and not fresh. Even rotted leaves can be used, and of course peat moss, which is widely available, although not a top choice for soil improvement, and harvesting it is seen by many as damaging to the environment.
The miracle of organic material is that it improves every type of soil. In sandy soil it will retain moisture and the particles trap nutrients in their structure. In clay soils the gums and resins in it bind the fine clay particles together, turning them into larger clumps, so that water flows more freely, and drainage is improved. More air enters the soil, inhibiting the organisms that can rot the roots, and bringing oxygen to the roots so they grow more vigorously. In all soil, organic material feeds the micro-organisms that recycle nutrients in the soil, and in the organic material itself. You won’t need chemical fertilizers very much, or not at all, if you release nutrients the natural way. When digging or rototilling your new beds, spread the organic material you have over the ground, and dig it well in. A layer 2 to 4 inches deep is about right, but its hard to add too much.
Step 4: Add the Basics to get a Balanced Soil
Most soils already contain plenty of the basic nutrients, but in some parts of the country they can be lacking. A simple soil test will tell you the levels of phosphate, which is the nutrient you should pay attention to when preparing the soil for planting. If the result is good, then nothing needs to be added. If the levels are low, then add products like superphosphate, bone meal, or transplant fertilizers when digging the beds and planting holes. Unlike other nutrients, phosphates don’t travel through the soil, so they must be mixed in, not scattered on top as an afterthought.
Some areas may lack other specific nutrients – ask at local garden centers or farm supply companies. These need to be added, or deficiencies can develop that are much harder to correct later.
Step 5: Follow-up with Rich Mulch
Once you have made your beds well, they will be good for years. Your planting is going to be more or less permanent, but you should still plan to take care of your soil long term. The best way to do that is to mulch your beds with organic material, instead of the more usual bark chips, shredded bark or stones. Simply spreading that material on the ground in fall, every few years, a couple of inches deep, will keep your soil healthy.
Not only does that mulch protect the soil from the damage of heavy rain, suppress wees, and prevent erosion, it releases a steady supply of nutrients that work their way down into the soil to feed your plants. This is a simple job. Do it every couple of years on sandy soil, and every 3 to 4 years on heavier soils.
These steps will give your beds and planting areas that your new plants will love. They will return the favor with vigorous, healthy growth, prolific flowering, and long life. Happy gardening.