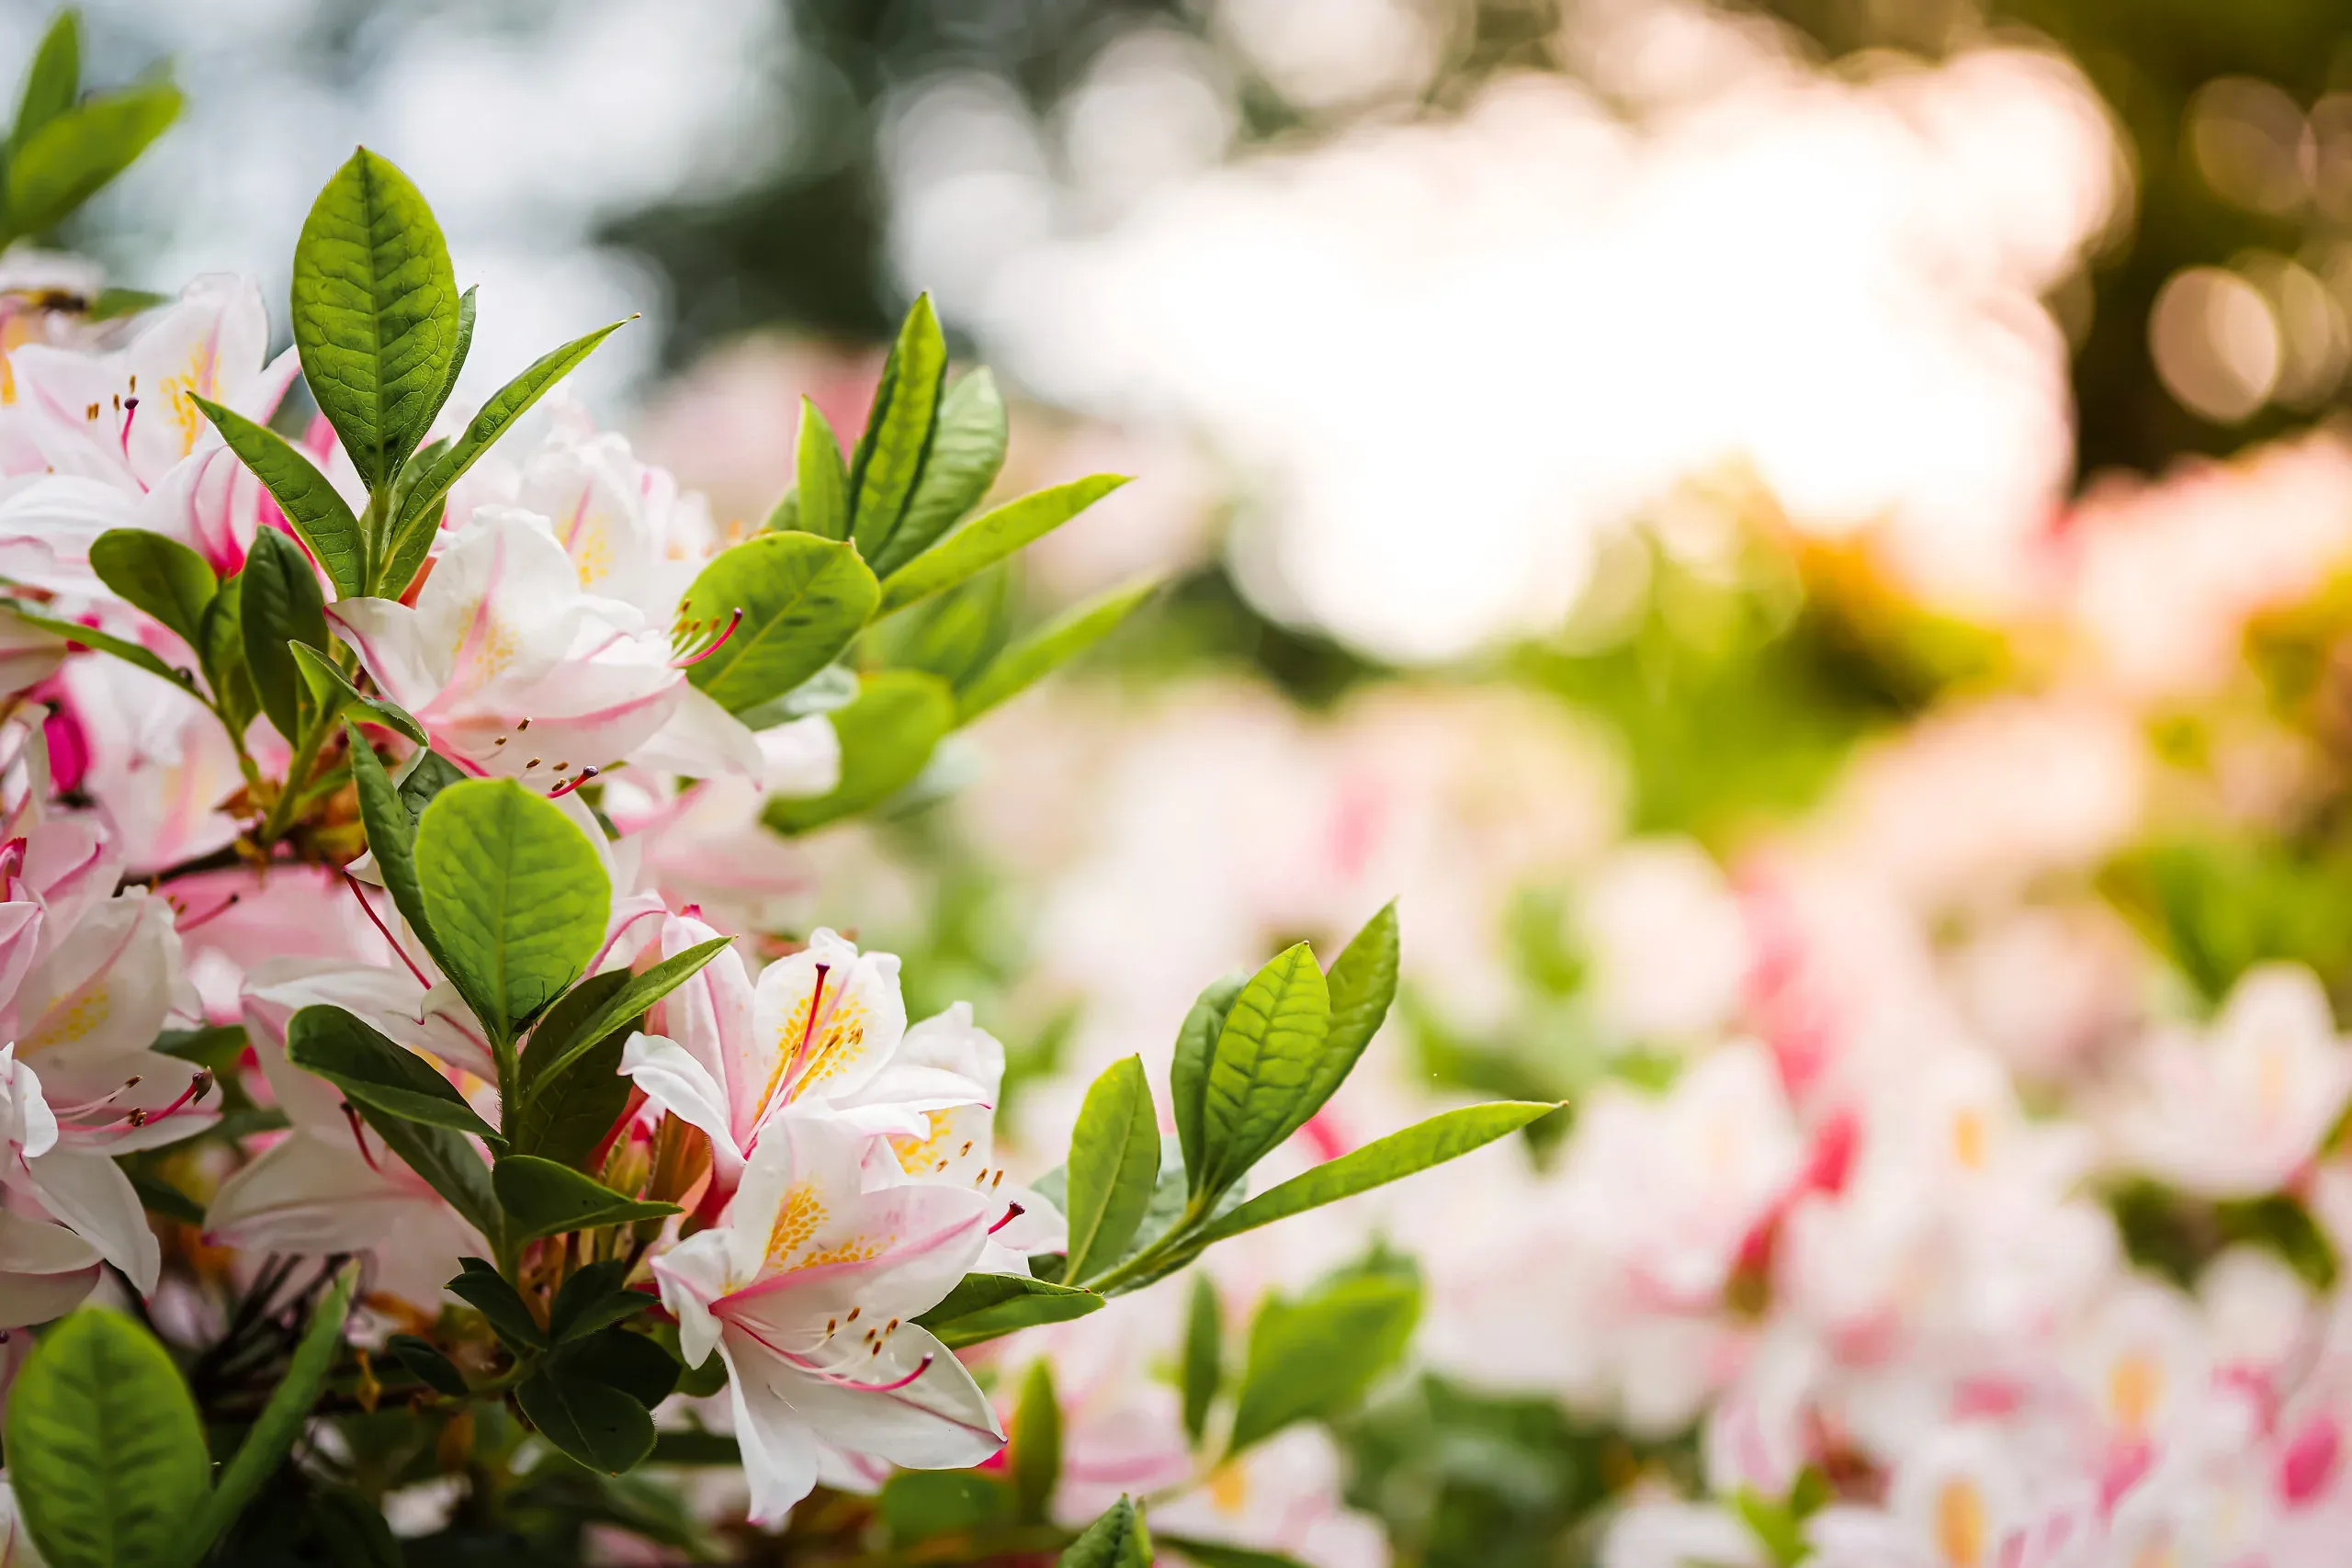
Planting Guides How To Plant Rhododendrons, Azaleas and Camellias
A whole group of plants have developed to live in acid soil conditions where other plants will not do so well. Top of the list for gardeners are Rhododendrons and Azaleas, closely followed by Camellias and since large parts of the country have acid soils, these plants are often easy to grow. This planting guide covers the special needs for planting and after-care of these plants, and other acid-loving plants. Now that your new trees have arrived and you are about to plant them, this guide will give you directions, tips and ideas to give them the best possible start in your garden.
In a Nutshell
- Remove all packaging
- Water your plant in its pot
- Check the pH of your soil
- Choose a suitable planting site
- Prepare the soil
- Dig a hole the depth of the pot
- Put the plant in its hole and replace most of the soil
- Water well, let the water drain and put back the rest of the soil
- Mulch with peat moss and water regularly
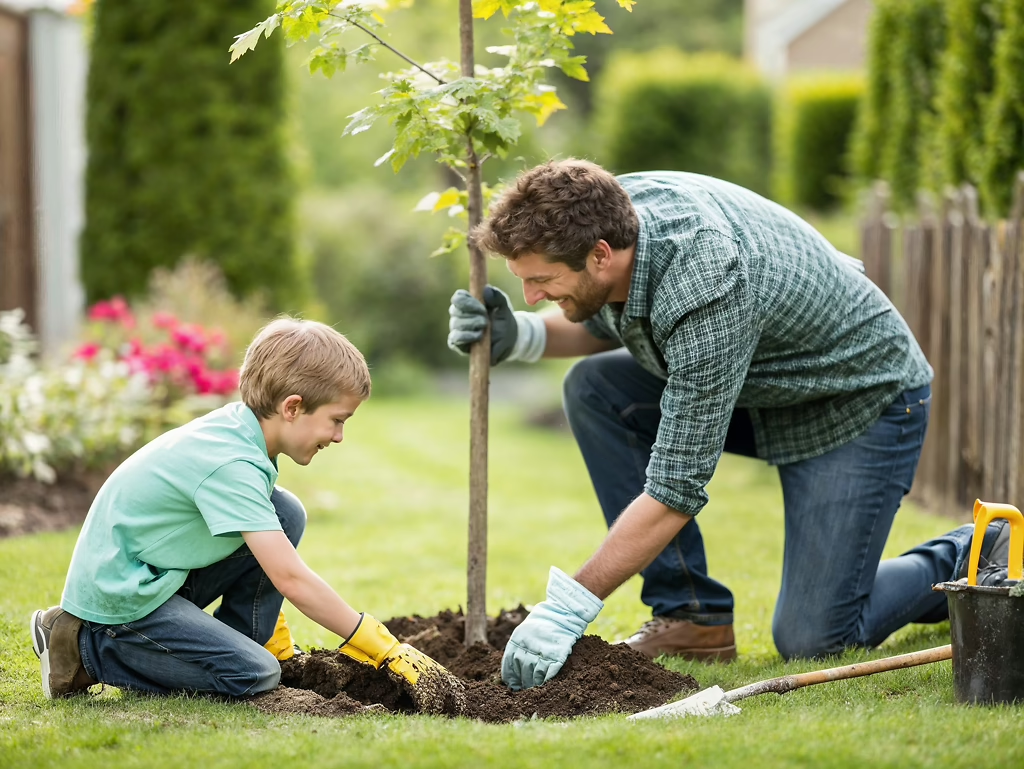
Remove your tree from the box
The very first thing to do is un-wrap your plants. Remove all the wrapping materials, remove the plants from the box and remove any wrapping around them. Leave them in their pots until you are ready to plant.
Move your plants around by picking up the pot – do not lift it by the trunk or stem.
Care Before Planting Time
Your plants have been on a journey and they will be a little stressed, so place them in a shady part of your garden and give them a good watering. Do not put them in the garage, a shed or in the house, even if it is cold outside. Your trees will live happily in their pots for some time as long as you provide basic care. Remember to water every day or every second day, depending on how warm the weather is – do not let the pot become completely dry. If it does become very dry, place it in a bucket and half-fill the bucket with water so that the soil can soak completely.
Checking your Soil
If you have not done already, the first step in planting acid-loving plants is to test your soil. Simple soil-test kits can be found at garden centers and hardware stores and it just takes a few moments to test your soil. A pH range of between 5 and 6 is ideal for acid-loving plants, so if that is the result of your test you are set to go.
If you soil is below 4.5 you may need to add a small quantity of lime to your soil to make sure enough nutrients are available for good plant growth.
If your pH is between 6 and 7 then with some soil-modification and correct fertilizer choices you can easily grow these plants successfully. The most important path to success is to use iron chelate each spring. This material is available from several sources and makes growing acid-loving plants easy for everyone.
Even just a little over 7 should not be a problem if you use chelated iron regularly, but if your soil has a pH of 7.5 or more then for complete success grow these plants in pots, as explained lower down in these directions.
Choosing a Planting Location
After a suitable soil pH range, the second need for your new plants is partial shade. If you live in zone 5 and are able to provide sufficient water then these plants can do well in full-sun, but as we move further south it is best to provide at least afternoon-shade and in hot regions full-shade, for your plants.
Shade from a building or from deciduous trees is ideal, as the shade of evergreens is often too dense for good growth underneath. Areas to the south of trees, where there is shade but the sky is visible, are ideal spots for these plants and an attractive gardens can be made along the edge of a wooded area.
Preparing the Planting Site
Good soil preparation is the key to success with acid-loving plants. If you already have suitable acid soil, then the process is simple.
You goal is to make a large area of looser soil that the young roots can penetrate easily, getting food as they go and establishing quickly. You need to have an area at least three times the diameter of the pot, dug as deep as your spade will go. Add plenty of sphagnum peat moss to the soil as you prepare it. Sphagnum peat is the brown kind that is often sold in compressed bales. The black kind of peat moss is not so suitable for these plants.
If your soil is between pH 6 and 7, then add about one-third of the volume of your soil as sphagnum peat moss. This will create a slightly raised bed, which will also help keep the soil more acidic.
Remove roots of weeds from the area and any stones bigger than your fist. Smaller stones can be left and it is not a good idea to sieve the soil to remove smaller stones – they are best left in and can help with drainage.
Turn over the soil, mixing the peat moss into it and then level off and get ready to plant. Save some of the peat moss you used to mulch after planting.
Preparing the Plants
The evening before you are going to plant, give the pot a good soaking with water. If the root ball is dry when you plant, it may stay that way and your plants may suffer from dryness even if the surrounding soil is damp.
Digging the Hole
Now dig a hole in the exact spot where you want your plant to be, making it twice the diameter of the pot, but only just as deep. If you have dug the soil deeper than that, use your foot to press down the soil in the bottom of the hole, to form a firm base beneath the tree. This is to prevent it from sinking deeper than you want in the hole after you have planted it.
Removing the Pot
Take your tree to the planting hole and slide the pot gently off. You may need to tap the edge a couple of times to release the roots, but it should slide out pretty easily. Usually there will be plenty of roots filling the pot and the root-ball will stay together and not fall apart at all.
Planting
Now place your plant in the centre of your hole, checking that the top of the root-ball is level with the soil around it. Replace about three-quarters of the soil in the hole, pressing it down around the roots of your tree.
Watering the Tree
Now fill the hole with lots of water, letting it soak down into the ground and into the root ball. Use plenty of water and then wait until it has all drained away. This will give enough water around the roots, where it is needed.
Finishing the Planting
Now put back the rest of the soil, firming it gently down. Make sure you have only covered the top of the root ball with a very little soil, no more than one inch. If you can still just see the top of the root ball, that is fine. Some gardeners like to make a low wall of soil around their plants, at a spot about twice the diameter of the pot, to retain water. This is a fine thing to do, but not absolutely necessary. Mulch over the root area with sphagnum peat moss, about three inches deep and then water the whole area thoroughly.
Planting in a Container
If you do not have acid soil you can still enjoy Rhododendrons, Azaleas and Camellias by growing them in containers and these are plants that will live happily in pots for many years, since they have do not have large root-systems.
Make sure your container has a drainage hole. This is vital. Holes can be drilled with a slow-moving drill if necessary, even in ceramic containers.
Use potting soil designed for acid-loving plants. Place a stone or piece of broken pot over each drainage hole and partially fill the pot with soil. Place your plant in the centre of the pot so that the soil level is about one inch below the top of the pot. Fill around the roots with soil, finishing with a thin covering over the roots. Firm down gently, not hard. Leave some space at the top of the pot so that when you water it is held in the pot and soaks down properly. Water thoroughly with a gently flow of water until you see water coming out of the drainage holes.
Plants in containers need watering regularly and should never be allowed to dry out. Feed according to the instructions with any kind of fertilizer for acid-loving plants. Always water until excess water drains out of the pot – that way the soil will be properly wetted and excess fertilizer will not build up in the soil.
Follow-up Care of the Acid-loving Plants
Until your plants are established and have spread out their roots, they will need regular watering. How often depends on the weather, but a good, slow soaking twice a week is usually best, or three times a week if the weather is hot. Soak the whole area around the plant, not just against the stem.
Replenish the peat moss mulch over the roots each spring and never let your plants become completely dry. The only trimming necessary is to remove any small twigs that may die as your plants grow and develop. Use a fertilizer for acid-loving plants each spring, according to the directions.
So that is it. Your new Rhododendron, Azalea or Camellia is set for a great life and will reward you with greater and greater beauty every year as it develops into a perfect specimen. A little care really pays off.[/vc_column_text][/vc_column][/vc_row]
Comments 17 comments
So informative!! Great read
Thank you this has been an excellent read for my Azaleas and Rhodos.
When and how do you prune it
Thank you, good advice!
Do azaleas mind rocky damp soil?
Where are you located?
I’m a newbie gardener and I know almost nothing about plants, bushes or trees. I’m anxious to learn.
How tall is the plant in a 5 gallon container?
How do I find our zone? Southeast Ohio is where we live. Thank you.
fewfe
I have read everything about how to plant, water, prune, etc, but not choosing the location for the Camellia plant. How far out from a fence should you plant the Camellia? I have a corner location and I put the plant about 1 1/2 feet out from the corner. My husband says it should be 3 or 4 feet out. Which is correct? I live in South Carolina
What is the best fertilizer for hydrangeas, encore azaleas and camellias?
How should we plant Ruby Slippers Hydrangeas?
Why won’t my azaleas bloom? Zone 8 in partial shade . Healthy green foliage just doesn’t flower anymore
I purchased a Nova Zembla Rhododendron in a #5 container. I live in zone 5B. I selected a site between 2 mature long needle white pines. The pines about 30 feet apart and “up cut” high so first branch rows are about 25-30 feet off grade. Lots of pine needles below that provide mulch. The site gets full sun for a few hours then hours of part sun to dappled shade. Guessing some sun 60% of the day mostly mid day. I want to place this Rhododendron exactly between these tall pines to fill a gap left when we removed a large Amur Maple this spring. Question one: Will the plant do well going under and between the established pines and ever mulched with the pine straw? Question 2: Is the pine straw enough to change the surrounding soil Ph to more acidic? Upper IL our soil Ph is more Alkaline. I see Rhododendrons as under story plants mixed in landscapes under tall pines all the time. So wondering.
How far apart and from the house should my azaleas be planted in my flower bed?
What is the best fertilizer for rhododendrons?
Hi there I am a triple amputee and deaf lost both legs and left hand and poor right rist I have prosthetics now I have a 30 ft greenhouse I built and 1 acre on land I was in a bad accident got hit with 440 voltage of electricity but funds are very tight so I want to grow shrubs and all kinds of plants I grew up on a greenhouse farm 2 , 250 long greenhouses full of Tomatoes so not scared of working hard I no I am looking at 5 to 10 years on trees and shrubs I want to start my own trees from cuttings and seeds I have 25 ft of heat boxes for starting cuttings but could you help me with getting seeds going on firs spruces of monkey trees I want keep positive and not just lay around I live on 1800.00 per month that is food rent and bills so you can see I can’t just say I will pay you for your help I will try to give you as much as I can not looking for hand out just a hand up if you will help some I will show you what I do to show folks I am not lazy I was just doing Repeling down 25 story building fund raising funds for helping families needing medical help and to teach folks you can be in a accident but get back up my email is normrt1@yahoo.ca and my text is 2502101867 I am stone deaf so can’t talk on phone than you so much Norm Thompson